Tuesday, August 18, 2009

Clean Eating Brownies

My daughter made these today, and they are YUMMY! This recipe is from the current issue of Clean Eating magazine - my favorite magazine for recipes!

BROWNIES

1 cup whole-wheat flour

1/2 cup unsweetened cocoa powder

1 tablespoon cinnamon, ground

1 teaspoon baking powder

1/4 teaspoon sea salt

1 cup cooked sweet potato

1/2 cup agave nectar

1/4 cup olive oil

1 teaspoon pure vanilla extract

6 egg whites

Olive oil cooking spray


ICING

1/2 cup low-fat plain cream cheese

3 tablespoons agave nectar

1 tablespoon unsweetened cocoa powder

1/2 teaspoon cinnamon, ground

1 tablespoon water {optional}


1. Preheat oven to 350°F.

2. Prepare brownies: Combine flour, cocoa powder, cinnamon, baking powder and salt in a medium bowl and set aside. In a food processor, combine sweet potato, agave, oil and vanilla. Puree until combined and smooth.

3. Gradually mix wet ingredients into dry ingredients, until just combined; do not over-mix.

4. In a separate dry bowl, whisk egg whites until fluffy. Then, using a rubber spatula, gently fold egg whites into batter.

5. Lightly spray sides of baking pain {9 x 9 x 2-inch} with cooking spray. Pour batter into pan and place into oven. Bake for about 16 to 18 minutes or until a toothpick inserted into the center comes out clean. Remove pan from oven and allow brownies to cool to room temperature, about 30 minutes.

6. While brownies are cooking or cooling, prepare icing: In a small bowl, combine cream cheese, agave, cocoa powder and cinnamon. Whisk until incorporated, adding 1 tablespoon water if mixture is hard to whisk. Cover and refrigerate until needed.

7. Loosen brownie and turn slab out onto a cutting board or platter. Cut into 16 pieces, wrap and refrigerate overnight.

8. To serve, divide icing evenly over each brownie and serve immediately. Leftovers may be kept refrigerated in a resealable container for up to 2 days.


Nutrients per brownie: Calories: 140, Total Fat: 5g, Sat. Fat: 1.5 g, Carbs: 21 g, Fiber: 2 g, Sugars: 12 g, Protein: 4 g, sodium: 75 mg, Cholesterol: 5 mg.

Friday, August 14, 2009

Fun Fridays Workbox Idea


One of the boxes I am going to rotate into my 12 yo daughter's week is a "Beauty Break" box. This is one of those fun boxes for my daughter to look forward to. I created a Ticket for the box, and am collecting items to put in: nail polishes, nail decals, lip glosses and other cosmetics, beauty tips, etc. She loves this!


Although this is an idea for older girls, I think that it could probably be modified for the younger girlie girls with play make-up or nail stickers. The possibilities are endless!

Thursday, August 13, 2009

Open-Ended Workbox Art Idea

When old age shall this generation waste,
Thou shalt remain, in midst of other woe
Than ours, a friend to man, to whom thou say'st,
"Beauty is truth, truth beauty," - that is all
Ye know on earth, and all ye need to know.


An "extra?" A "recipe?" Not in my world. Art should be expressive and personal but not optional or stilted. I dislike some of the popular "cake mix" art instruction curriculum, and my daughter despises them. Art is not an "extra," it is part of our core curriculum, and so I am always looking for ways to incorporate it in a hands-on way. Hands-on art is different from picture study, which is described in detail HERE.

To require or inspire? I have also found that the best assignments are ones that my daughter comes up with herself. While letting her take the lead in some ways, it is also important for her to be exposed to a myriad of types of art from various time periods. How can she know whether she enjoys something if she has never been exposed to it? I want to spread a
bounty of beauty before her, while still allowing her to be free to accept or reject those works according to personal taste. The question is, "How?" For more on the "How?" questions, go HERE.

"Design an Art Lesson" Workbox


Here is one simple idea for an open-ended art assignment for children aged 11-12+ using those art prints, cards, or art games you have laying around.

*For youngers, I would simply do a picture study, and get them used to imitation and narration of favorite works first. Open-ended assignments may frustrate a younger child who is still in the concrete grammar stage
. One idea is to put a picture in the box with a task card like, "Tell me the story of this picture," "Play the game with Mom or a sibling for 30 minutes," or "Recreate this painting in pencil, paint, or clay."


1) Put Art cards, art prints/calendar prints, or art games in the box. I happened to have this art card game called "Close Up" that I picked up at the National Gallery. I have tons of these laying around, but if you don't, check out the art postcards from Dover. Assuming they have a strong background in art, encourage them to THINK! to come up with an art lesson. For example, the lesson could emphasize art history, an artist, an element of art, a school of painting or feature a creative recreation that puts their own "spin" on the work. Let them Think! and even wrestle with this if they are aged 12 or so and up!


2) Add a task card: This is the trick: write an open-ended card for an older child, or concrete one for a younger. (Make sure you have a variety of quality art paper, art pens, paint, brushes, and pencils on hand!) Here is the Task Card I made for my rising 7th grader.


That is it!
This is such a simple idea that I blushingly hesitate to even post it, but simplicity and unfussiness are a great thing.


Tuesday, August 11, 2009

My Year 7 Organizer

I have been in search of the perfect assignment/record keeper for fall. I wanted something to fill in AFTER the work is done, and I wanted a WEEKLY, not daily format. Oh. and it needs to be pretty. Yes, pretty matters.

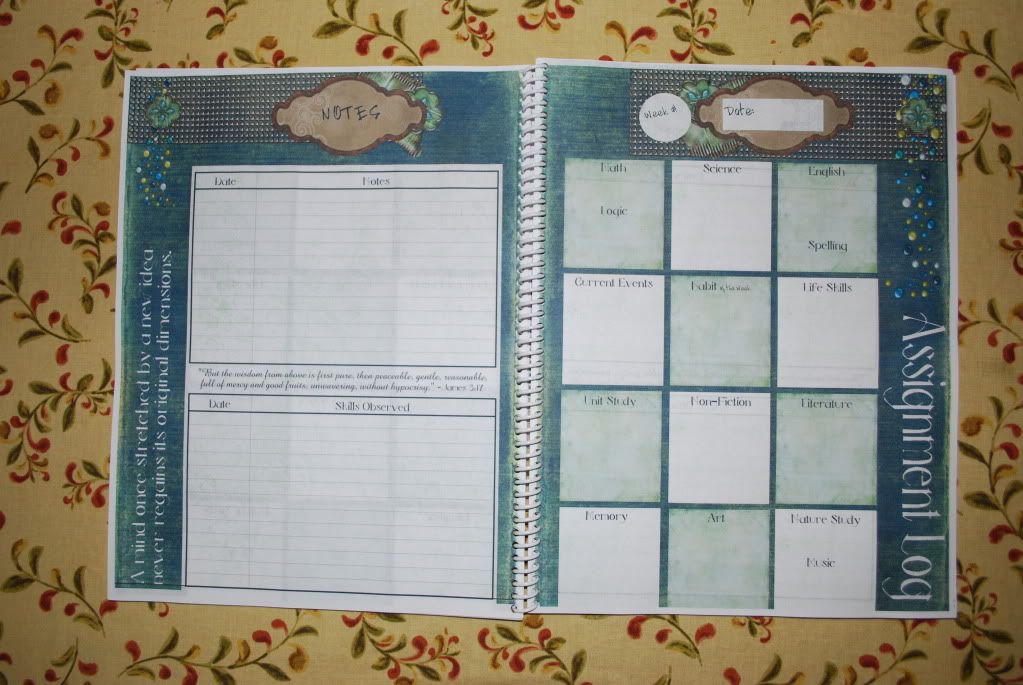
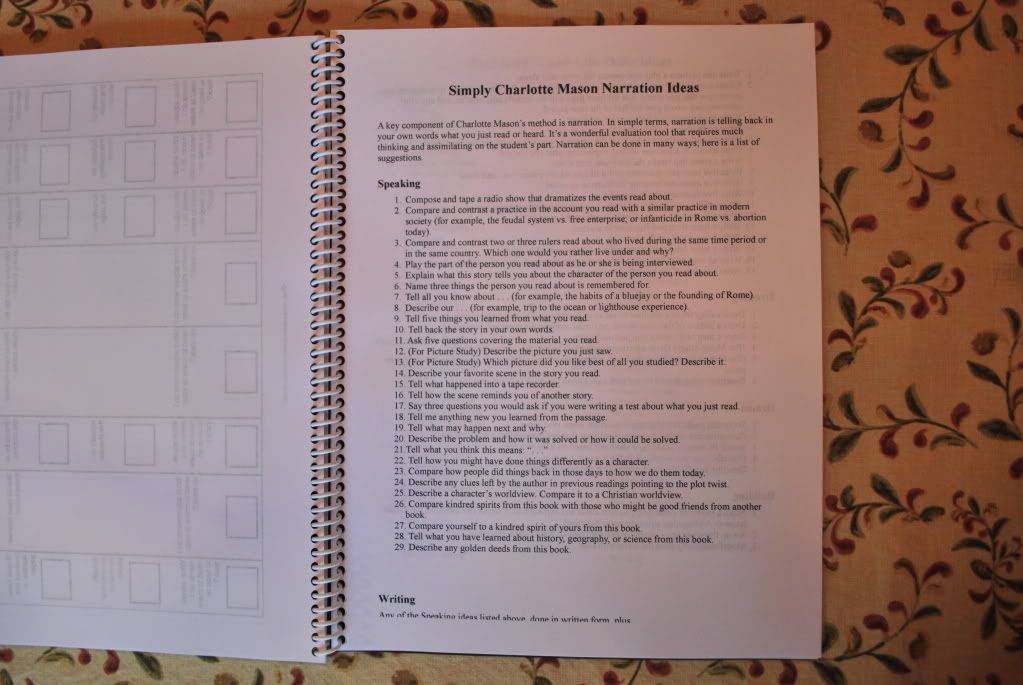
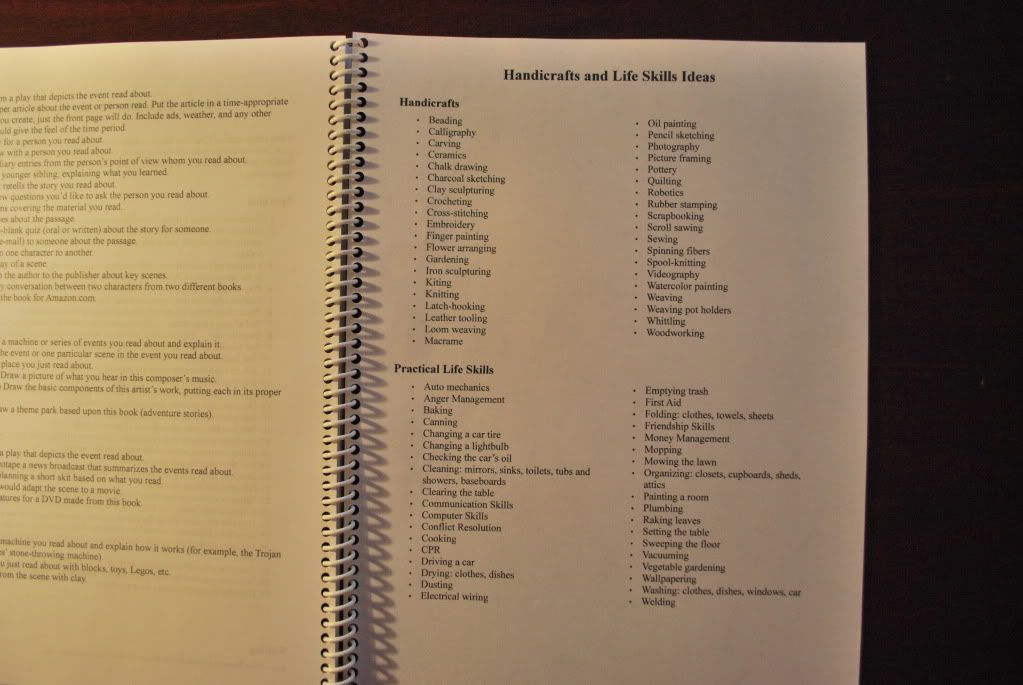
Since dd is not using a daily, paper checklist this year, I wanted to be able to keep a record of what was actually done each week, and I also wanted a place to keep my notes and assessments of skills that I need to follow up on. This Organizer is for assessment purposes, recording what was actually DONE (after the fact), and making notes for myself. I ended up making my own using a combo of some Tanglewood Corebook pages, and my own weekly planner pages using my Creative Keepsakes Designer, Simply Charlotte Mason Narration and Handicraft ideas, Donna Young Academic Calendar, and the free Shabby Princess paper kit "Spontaneous Delight".

Organizer COVER

LEFT side of Organizer

RIGHT side of Organier


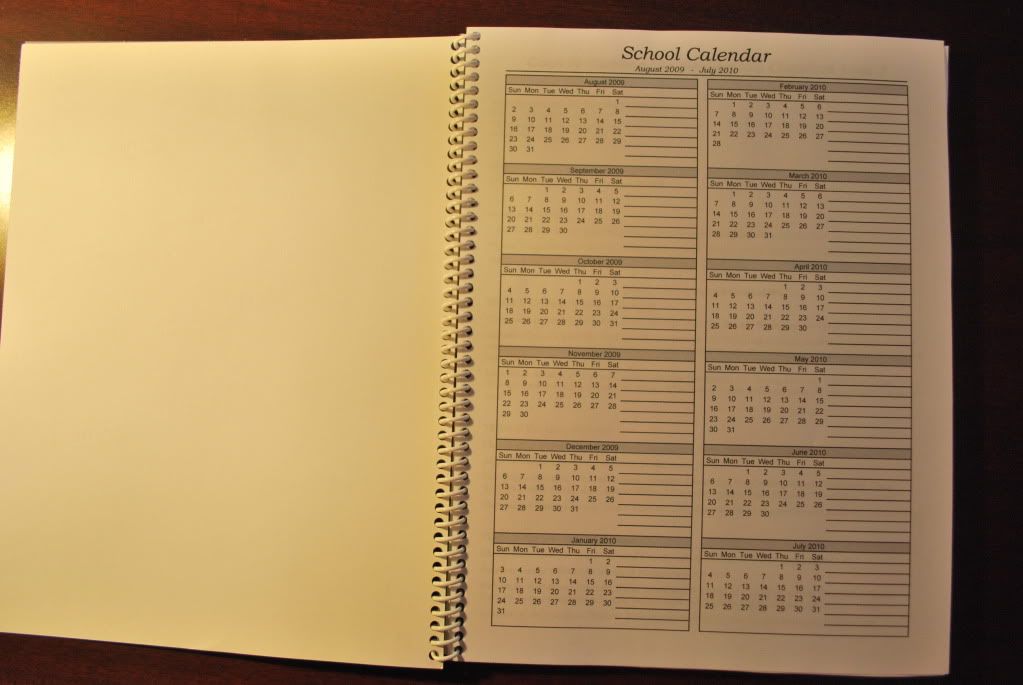
I laminated the cover, and am taking it to Office Max to be spiral bound (hopefully!)today. I spent a crazy amount of time on this, but I love it! *Update - I added pictures below of what it looks like spiral bound. With front/back cover and binding, it only cost $3.99!


My Assignment Organizer pages:


1) School Calendar (Donna Young)

2) Goals for the Year (Tanglewood Corebook)


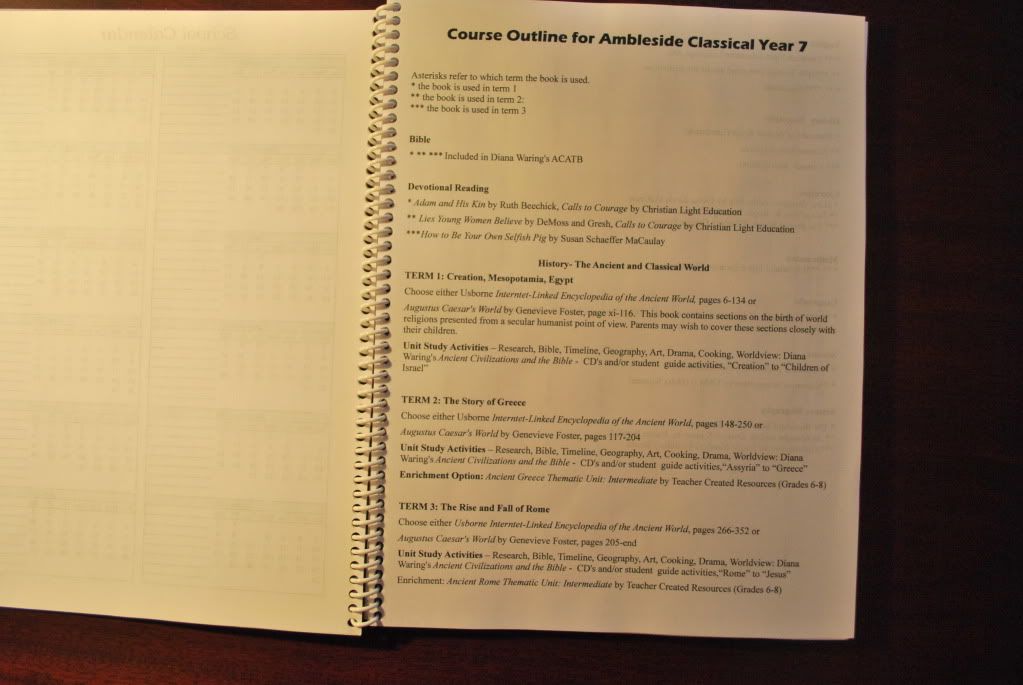
3) Course Outline (custom)


4) Thirty-six 2-page academic organizer pages with space for subject-by-subject notes, skills observed and general notes (custom)


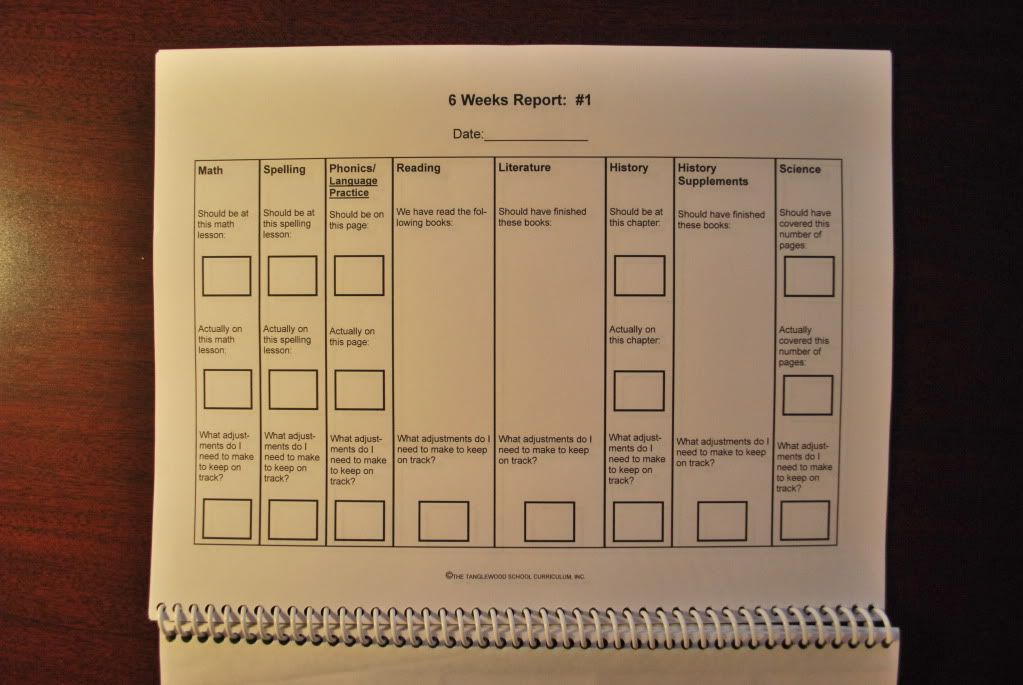
5) Six 6-week goal assessment pages (Tanglewood Corebook)


6) Narration Ideas (Simply Charlotte Mason)


7) Handicraft/Practical Life Ideas (Simply Charlotte Mason)


Ta Da!

Saturday, August 08, 2009

The Underhanded Way I Got My Husband To Happily Shop and My Tween to Be Thrifty


"Sometimes I've believed as many as six impossible things before breakfast." ~Lewis Carroll


It was Family Fun day today, and not only was the weather stormy and wet - there were not many coins in the coffer. (Is it just me, or is everything from coffee to bowling extremely overpriced in Suburbia?) At this time of the year, clothing, school/office supplies, books, and so many other things need to be bought. My idea this week for Family Fun was meant to be peaceful, fun, inexpensive, and to also to do the impossible: to get my husband to happily shop and my tween to enjoy being thrifty. It would be nice to get some needed shopping done, despite the fact that I live with two Non-shoppers and the fact that our coin purse is low. : )

I started off by inviting The Fam out for a thrifty luxury: a pot of tea at the local teahouse. The place is Zen-inspired: uncluttered, clean and unfussy, and full of the delicious fragrance of every tea you can imagine. For $7.95, we all sat enjoying our steaming cups of Berries and Cream as the storm clouds did their worst outside. The tea house also gives you the used tea and will also refill the pot, so we had a second pot for free. How's that for THRIFTY fun?

Ok, now that The Fam was all peaceful and open to suggestion (I think it was because of the hypnotic pan flute music at the teahouse, but it could have been something in the tea), I sold them my subversive Plan. I called it the "Get the Style for Less Challenge." Showing a clothing ad with the latest, trendy fall fashions, I issued a Challenge: Recreate one of the Looks in the ad for $6 or less at the Thrift store. That's right, $6!!! This is for tops/accessories only, not jeans. My husband went for it, as he is always up for a Challenge, and I have previously brainwashed him by exposing him to plenty of "What Not to Wear" episodes. My tween liked the idea of getting $6 to spend and of getting to show us old folks how out of it we are. : )

It was so much fun, my husband didn't think about the fact that we were SHOPPING, and my tween forgot about the fact that she was not only SHOPPING but shopping in a THRIFT STORE. To our delight, the store had all clothing 50% off today. What a blessing! One of the outfits didn't end up fitting, so we only got 2. We had a blast though! All of us agreed that hubby's Look, the print top with jacket, was the winner! For $1 each, dd also picked out a funky plaid hat and a cute pink top. Our shopping list was: 3 tops, 1 jacket, 2 necklaces, 1 belt, and 1 hat for a grand total of $14! Most of the items were new with tags still on.

Here are some photos of the Look were were trying to recreate, and the 2 outfits we came up with. The plaid top with belt is much cuter than it looks in the pic. :) Also, we couldn't find a leather jacket in our price range, so we substituted denim.


Now, go out there and do something impossible, live well with less, choose joy, and don't forget to ACCESSORIZE. ; )


Wednesday, August 05, 2009

Beginning the Second Leg of Our Journey with Unit Studies and CM

We are beginning our second and final six-year history rotation this year. I have been busy with last-minute preparations and details. It feels good to be finished now. We will be studying Ancient History and Chemistry for 7th grade, but it seems like just yesterday that we were studying Story of the World in Year 1 and making all those fun elementary-aged projects. SIGH. Oh well, that is another post. : ) Here is the course outline for the upcoming year combining elements of AmblesideOnline and Diana Waring's Ancient Civilizations and the Bible:

Course Outline for Ambleside Classical Year 7

Asterisks refer to which term the book is used.
* the book is used in term 1
** the book is used in term 2
*** the book is used in term 3

Bible

* ** *** Included in Diana Waring's ACATB

Devotional Reading

* Adam and His Kin by Ruth Beechick, Calls to Courage by Christian Light Education

** Lies Young Women Believe by DeMoss and Gresh, Calls to Courage by Christian Light Education

***How to be Your Own Selfish Pig: And Other Ways You've Been Brainwashed by Susan Schaeffer MaCaulay

History- The Ancient and Classical World

TERM 1: Creation, Mesopotamia, Egypt

Choose either Usborne Interntet-Linked Encyclopedia of the Ancient World, pages 6-134 or

Augustus Caesar's World by Genevieve Foster, page xi-116

Unit Study Activities – Research, Bible, Timeline, Geography, Art, Drama, Cooking, Worldview: Diana Waring's Ancient Civilizations and the Bible - CD's and student guide activities, “Creation” to “Children of Israel”


TERM 2: The Story of Greece

Choose either Usborne Interntet-Linked Encyclopedia of the Ancient World, pages 148-250 or

Augustus Caesar's World by Genevieve Foster, pages 117-204

Unit Study Activities – Research, Bible, Timeline, Geography, Art, Cooking, Drama, Worldview: Diana Waring's Ancient Civilizations and the Bible - CD's and student guide activities,“Assyria” to “Greece”

Enrichment Option: Ancient Greece Thematic Unit: Intermediate by Teacher Created Resources (Grades 6-8)


TERM 3: The Rise and Fall of Rome

Choose either Usborne Interntet-Linked Encyclopedia of the Ancient World, pages 266-352 or

Augustus Caesar's World by Genevieve Foster, pages 205-end

Unit Study Activities – Research, Bible, Timeline, Geography, Art, Cooking, Drama, Worldview: Diana Waring's Ancient Civilizations and the Bible - CD's and student guide activities,“Rome” to “Jesus”

Enrichment: Ancient Rome Thematic Unit: Intermediate by Teacher Created Resources (Grades 6-8)


History Biography

* Pharoahs of Ancient Egypt (Landmark)

** Famous Men of Greece

*** Famous Men of Rome


Literature

* Mara, Daughter of the Nile by Eloise Jarvis McGraw

** Tale of Troy by Roger Lancelyn Green

*** The Bronze Bow by Elizabeth George Speare


Geography

* ** *** Geography of Ancient World included in Diana Waring's ACATB. Map work integrated with history reading.

Science

* **Chemical Interactions by Prentice-Hall

* **Chemical Interactions by DSM II (Delta Science)

Science Biography

* The World of Chemistry by Tiner
**
Archimedes and the Door of Science by Jeanne Bendick
***
Galileo and the Magic Numbers by Sidney Rosen


How I Planned My Year Incorporating Workboxes


Many new homeschoolers ask how to plan out their year. There are many good ways to do this, but I will share what works for me.

I plan out my year of history, science, music and art in advance. I find having an overall plan makes things go smoothly. My dd is in 7th grade this fall, and we are new to workboxes. In my mind, it was important to keep goals for the year first and foremost, rather than just "filling workboxes." I don't care for needless busywork.

Here is how I planned the curriculum that I schedule in advance (for math and language arts, I just "do the next thing')
HINT: to build in time for bunny trail, extending topics of interest, or for catching up, I plan for 30-32 weeks of content, but actually do school for 36-38 weeks. I find it best to plan t0 have "Flex" weeks.

1) Choose basic history curriculum (I chose Diana Waring's Ancient Civilization and the Bible and it includes a variety of subjects in a unit study format).
2) Choose history and science biographies for the year (1 per term - I use AmblesideOnline heavily).
3) Choose a history overview book (I chose Usborne Encyclopedia of the Ancient World).
4) Choose a science overview book (I chose 'Chemical Interactions' by Prentice Hall).
5) Choose science enrichments (fun books, videos, kits, etc)
6) Choose a composer for each 12-week term. (I use AmblesideOnline).
7) Choose an art appreciation for the term (I chose the "Art in Ancient ________" series).
8) Choose one important, quality literature book per term (I use AmblesideOnline Year 6 heavily).
9) Choose independent devotional reading

From there, I scheduled each one of the above into 12-week terms. I use something similar to the pattern from AmblesideOnline "Books." http://amblesideonline.org/06bks.shtml
It is extremely helpful to me to envision what my year will look like so that I can gather materials and use time wisely. I also tweak as I go.

For workbox plannning, I broke down:

1) Core Subjects Done Daily
2) Core Subjects Done Twice Weekly
3) Subjects Done Once per week
4) Surprise Me! (Games, Beauty Break, Online Educational Games, Craft kits, Treat, Movie Tickets, Gift Card to go shopping with, Scrapbook items, etc)
5) Enrichments to rotate in (Baking, Cooking, Health, Dance DVD, sports skills, etc)

My boxes ended up looking like this:

  • Box #1 - Usborne Encyclopedia of the Ancient World alternated with Prentice Hall Chemical Interactions
  • Box #2 - Math
  • Box #3 - Literature
  • Box #4 - Composer Study alternated with Phy-Ed, 10 Free Time Minutes Ticket
  • Box #5 - Memory Work
  • Box #6 - Diana Waring's Ancient Civilizations and the Bible (cd's and student manual)
  • Box #7 - Poem-A-Day, Lunch Ticket, Ticket for 30 Free Time Minutes
  • Box #8 - Rotating Studies (one chosen each day) - Nature Study, Logic, Science Biography, or Art Appreciation
  • Box #9 - Grammar and Spelling
  • Box #10 - Devotional Reading (CLE Calls to Courage alternated with Adam and His Kin)
  • Box #11 - SURPRISE ME - something fun and different each day
  • Box # 12 - Enrichment - a Home-Ec, Art/Craft or Health-related task or activity such as baking a muffin recipe

For storage, I have a big bin with a bunch of manilla envelopes in it. I am using the bin to gather "SURPRISE ME!" items and "Enrichment" items so they are ready to go and full of variety. I use the same bin to store my teacher's manuals. It's been a blast pulling out all those fun items that have been unused on the shelf. It's also exciting to think of SURPRISE ME! items to bless my dd with. Miss M loves doing nails, for example, so I am going to gather some fun nail polish colors and nail stickers to rotate in. I made up a ticket for a "Beauty Break." Since she is older she has a lot of work, but having at least one fun box and one enrichment box is motivating to both of us.

For books or subjects that require a schedule, I make the schedule up for the term and leave it in the box. For other boxes, I have task cards. I am also experimenting with the idea of subject contracts as outlined in High School: A Home-Designed Form-U-La see how this would work for us. I am doing a Subject Contract with one subject this year, and I chose Science. I am including the Subject Contract, and Schedule with the science textbook as a trial run for to see if the contract system would be do-able for us.

As far as a weekly schedule, my dd will not have weekly checklist sheet. This is feeling pretty radical to me! : ) Her workboxes ARE her schedule and living checklist! She will complete boxes #1-12, and when they are completed, her day is done. Two boxes have tickets for "15 minute break" or "Take a lunch break when you are finished with this box."

To help me coordinate variety into my boxes, I am using Andrea's Workbox Planner. There is a picture of the filled out grid on my slideshow. This is merely for my own planning purposes, not for Miss M.


I like the idea of getting the planning and gathering phase done early, and then simply letting school take care of itself using the workboxes method. Teaching prep is either done early on the "front end" or later "in the trenches." I find lessons to be much more haphazard when done "in the trenches." Things go much more smoothly when I am prepared and organized, and I love how the workboxes organize all materials AND plans.

So there you go, a little about how I plan both my year and week with workboxes.